What is tile trim and where it is used for, how to maintenance
Product Description:
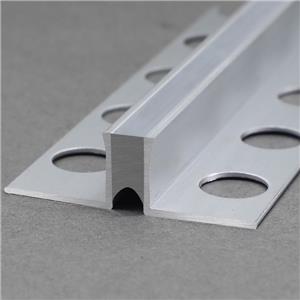
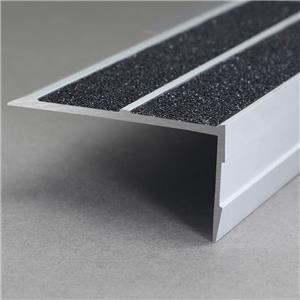
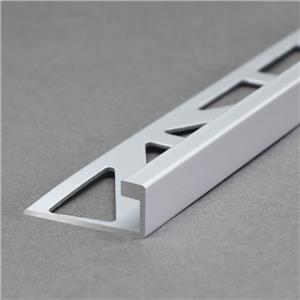
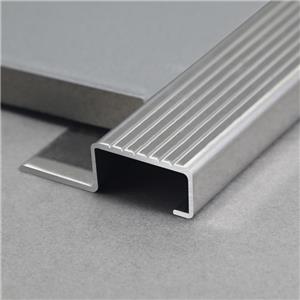
Tile trim made of high quality aluminium, this unique tile trim offers an attractive, professional finish to ceramic tile counters and walls. In order to ensure the product a long working-life, the profiles are offered with a transparent protective film to be removed after installation.
Technical Details:
Profiles are available in different anodized finishes and powder coated finishes . All natural aluminium (mill finish) has a oxide film of approx 0.2 microns. When mechanically and chemically polished the anodizing process increase this to 5 microns, up -to 20 for the mat finish and 100 for powder coated.
Maintenance:
Aluminium tile trim does not require any special maintenance. Oxidation films on aluminium maybe removed with a common polishing agent; however, they do reoccur. Damaged anodized finishes may only be repaired by re-coating.
Aluminium must be tested to verify its suitability if chemical stresses are anticipated. Cementious materials, in conjunction with moisture, become alkaline. Since aluminium is sensitive to alkaline substances, exposure to the alkali( depending on the concentration and time of exposure) may result in corrosion ( aluminium hydroxide formation).
Therefore, it is important to remove adhesive or grout residue from visible surfaces. In addition, ensure that the profile is solidly embedded in the setting material and that all cavities are filled to prevent the collection of alkaline water. The anodized layer creates a finish that retains a uniform appearance during normal use. The surface, however, is susceprible to scratching and wear and may be damaged by tile adhesive, mortar, or grouting material. Therefore, setting materials must be removed immediately. Otherwise, the description regarding aluminium applies.
Installation:
1. select according to tile thickness
2. Trowel tile adhesive over the area that forms the perimeter of the tiled covering
3. Press the perforated anchoring leg of the eat into the tile adhesive and align, mechanical fix if required.
4. Trowel additional adhesive over the perforated anchoring leg to ensure full coverage.
5. Solidly embed the tiles so that the tiled surface is flush with the top of the profile,the profile should not be higher than the tiled surface, but rather up to approximately 1 mm lower
6. Fill the joint completely with grout.